Post by delpart on Jan 12, 2012 4:38:59 GMT
Okay Helen was asking about making a deeply recessed or deep shadowed button. I took a few minutes earlier to hammer a few ideas but I'm still getting stuck on the finesse of it. Even Sargon's method didn't work the way I thought it might ...
Without writing a tutorial, I'll try and explain my impression of a the deep recessed button: dark negative space surrounding the object that remains mostly/nearly unaffected by light sources.
To that end I used a dark line in the middle of a gradient and did some polar transformation to get a plausible fast effect (several takes but it's not as easy to get the right outcome on the bevel with this ...) ... overlay it with a more 3D looking button and its quick enough. If you want round or ovoid at least. Squares etc would require a couple of new plugins to approach in the same relative manner ...
I would up using polar inversion on one test and them played around and even made a button out of the same shadow form after metalizing it to outline the power button symbol... While I probably should be returning to hammering smoke, I had to take a sec to ask for input on the illusion needed for these things and where to draw the line (puns intended) on getting that effect without just painting in a circle.
Here's a link to Helen's source image she asked about for comparison: SOURCE COMPARISON
And here's my twisted take on using transforms of gradients with single dark line drawn in. First the gradient before the transform and a couple of transforms later. Please note I'm at a loss on blending this into anything, calling it an idea/WIP ... Also if anyone has any ideas on how to go about creating a deep shadow on the lip and still being able to blend it into a background that wont be solid color. Even Conditional Hue, tint, etc messed with the gradients too much and left me scratching my head.
What I transformed:
What it turned into:
History to show my broken idea in action:
Righto. While I'm sure we can adapt the emboss method from WB to create this, I just wanted a separate thread to collect any other random input that might prove useful.
Also, Sargon's method include here as I saw how it could be blended into where I was headed with this ... I did a quick try and had the other insight, then figured I'd better post it before it sat on my HD for a week or so ...
SARGON's brilliant method for getting button forms. Note the radial blur steps really help as an AA approach on the circles and circle selections when you can apply it to them in a very nice way.
"Helen try this simple method,
1- On a light gray background add a new layer
2- Make a circle selection
3- Fill it with B/W Linear gradient starting from top to bottom of the selection
4- Deselect and Align it in the center
5- Run Radial blur to about 30
6- Bulge to 100, repeat Bulge several times till you satisfied with the beveled edges and the concave center.
7- Run radial blur again ( optional)
8- Now duplicate this layer, zoom it out and rotate it 180 using Rotate/zoom
9- Gaussian blur on high the bottom circle as desired
10- You can add drop-shadow to the top layer if it is necessary.
Read more: pdnfans.proboards.com/index.cgi?board=intermediate&action=display&thread=38&page=2#ixzz1jDOQmK8s "
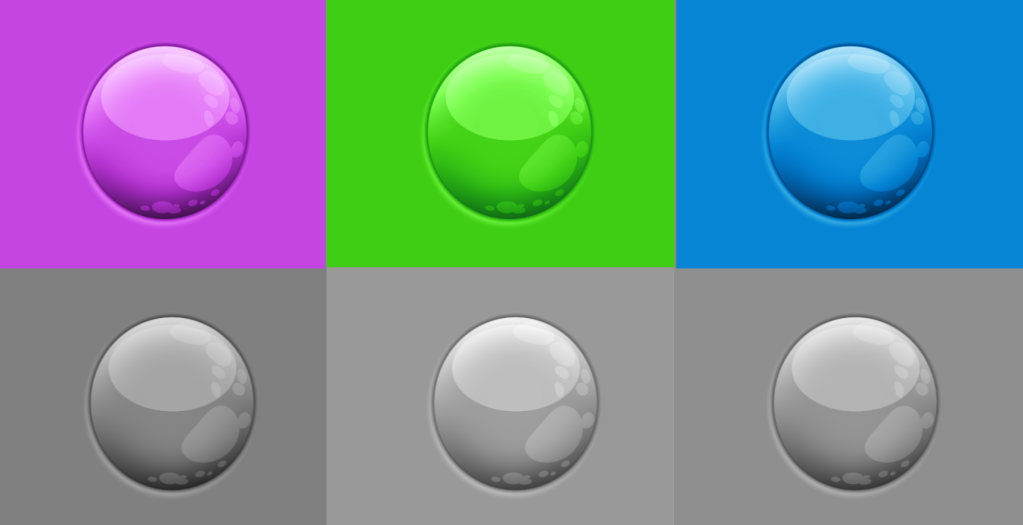
And the outcome from trying that (quick overview mind you):
1024 resolution: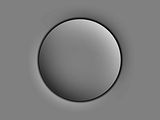
512 resolution: [URL=http://s1227.photobucket.com/albums/ee430/delpart/Scraps%20and%20postings/
sargonmethodbutton1024.png][/URL]
Maybe too much shadow on it. As it gets smaller it doesn't scale as well as I wanted ... but 512 is better than 1024 in some ways.
Righto, just wanted to throw that in here while it was on my mind. Feel free to point to other resources, how to's, post ideas, bash my head in a little, etc.
Without writing a tutorial, I'll try and explain my impression of a the deep recessed button: dark negative space surrounding the object that remains mostly/nearly unaffected by light sources.
To that end I used a dark line in the middle of a gradient and did some polar transformation to get a plausible fast effect (several takes but it's not as easy to get the right outcome on the bevel with this ...) ... overlay it with a more 3D looking button and its quick enough. If you want round or ovoid at least. Squares etc would require a couple of new plugins to approach in the same relative manner ...
I would up using polar inversion on one test and them played around and even made a button out of the same shadow form after metalizing it to outline the power button symbol... While I probably should be returning to hammering smoke, I had to take a sec to ask for input on the illusion needed for these things and where to draw the line (puns intended) on getting that effect without just painting in a circle.
Here's a link to Helen's source image she asked about for comparison: SOURCE COMPARISON
And here's my twisted take on using transforms of gradients with single dark line drawn in. First the gradient before the transform and a couple of transforms later. Please note I'm at a loss on blending this into anything, calling it an idea/WIP ... Also if anyone has any ideas on how to go about creating a deep shadow on the lip and still being able to blend it into a background that wont be solid color. Even Conditional Hue, tint, etc messed with the gradients too much and left me scratching my head.
What I transformed:

What it turned into:

History to show my broken idea in action:

Righto. While I'm sure we can adapt the emboss method from WB to create this, I just wanted a separate thread to collect any other random input that might prove useful.
Also, Sargon's method include here as I saw how it could be blended into where I was headed with this ... I did a quick try and had the other insight, then figured I'd better post it before it sat on my HD for a week or so ...
SARGON's brilliant method for getting button forms. Note the radial blur steps really help as an AA approach on the circles and circle selections when you can apply it to them in a very nice way.
"Helen try this simple method,
1- On a light gray background add a new layer
2- Make a circle selection
3- Fill it with B/W Linear gradient starting from top to bottom of the selection
4- Deselect and Align it in the center
5- Run Radial blur to about 30
6- Bulge to 100, repeat Bulge several times till you satisfied with the beveled edges and the concave center.
7- Run radial blur again ( optional)
8- Now duplicate this layer, zoom it out and rotate it 180 using Rotate/zoom
9- Gaussian blur on high the bottom circle as desired
10- You can add drop-shadow to the top layer if it is necessary.
Read more: pdnfans.proboards.com/index.cgi?board=intermediate&action=display&thread=38&page=2#ixzz1jDOQmK8s "
And the outcome from trying that (quick overview mind you):
1024 resolution:

512 resolution: [URL=http://s1227.photobucket.com/albums/ee430/delpart/Scraps%20and%20postings/
sargonmethodbutton1024.png]
[/URL]Maybe too much shadow on it. As it gets smaller it doesn't scale as well as I wanted ... but 512 is better than 1024 in some ways.
Righto, just wanted to throw that in here while it was on my mind. Feel free to point to other resources, how to's, post ideas, bash my head in a little, etc.