Post by Sargon III on Jan 16, 2011 4:52:16 GMT
Introduction to Cracks Effect, "Cracked Floor Mostly"
This tutorial is open to your suggestions, it needs your ideas and opinions on how to improve it:
Plugins needed for this tutorial:
1- Primary plugins:
Splinter
Toon
2- Secondary plugins:
Height Field to Normal Map, sorry can't find it you can use this instead
Sepia 2
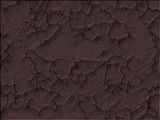
PART-1, basic crack effect:
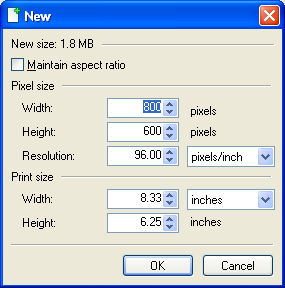
1- Start new file 800 x 600 pix:
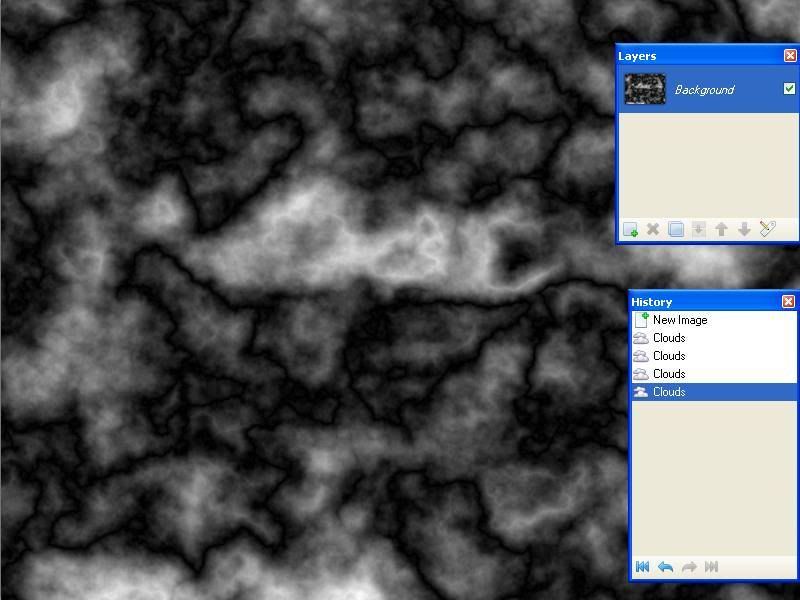
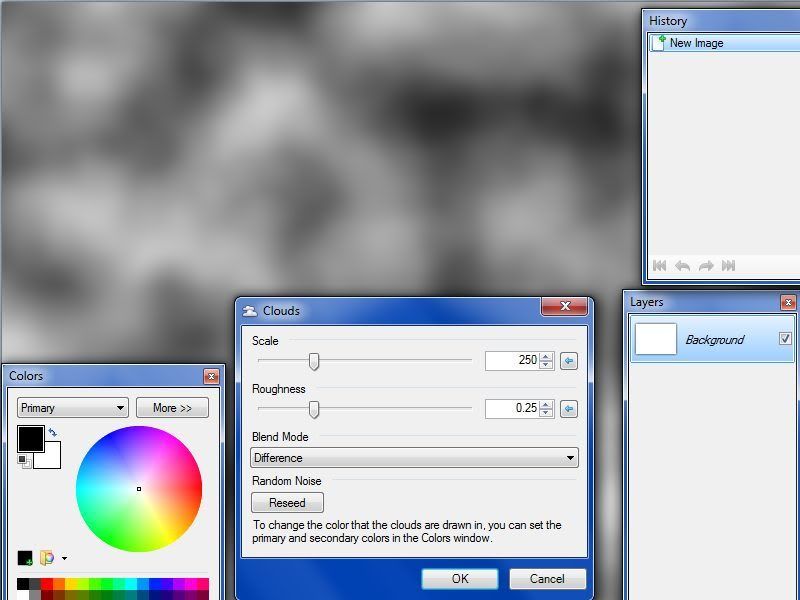
2- Apply clouds with Default settings using Difference Blend Mode,

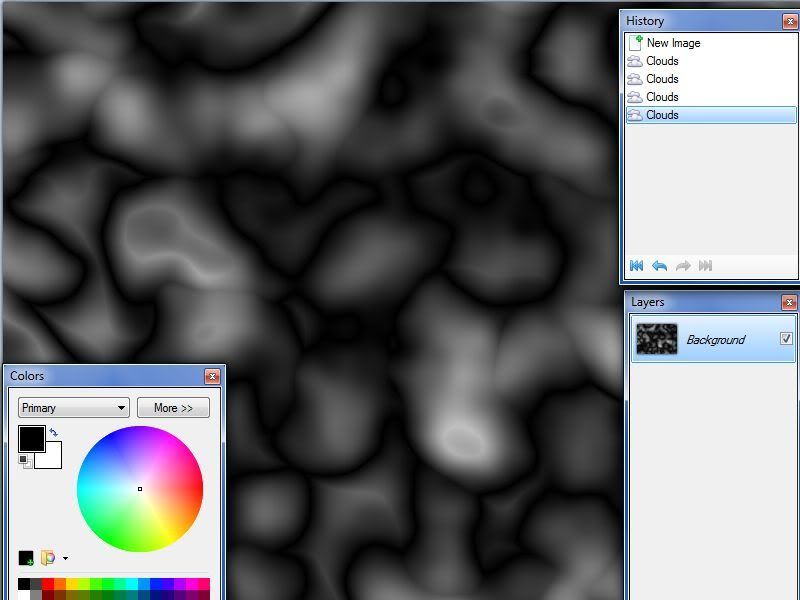
3- Repeat Clouds 3 more times on same layer, so total is four:
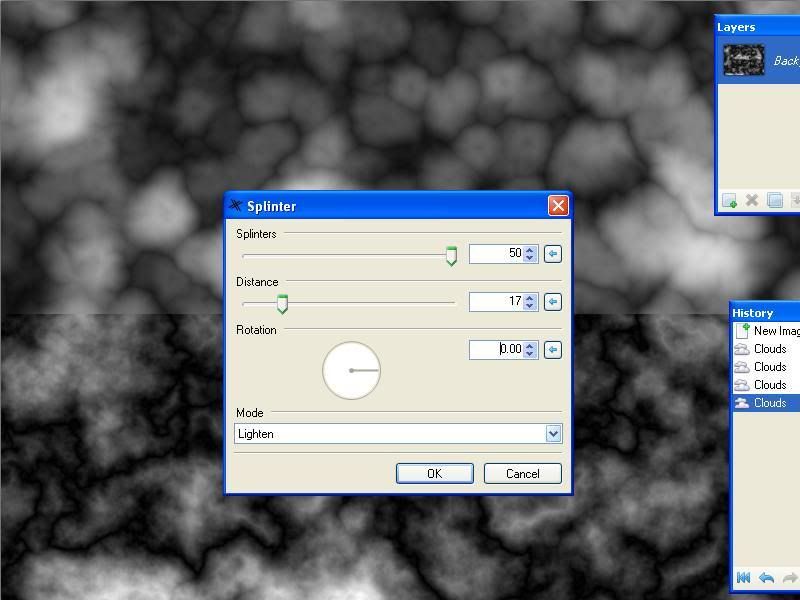
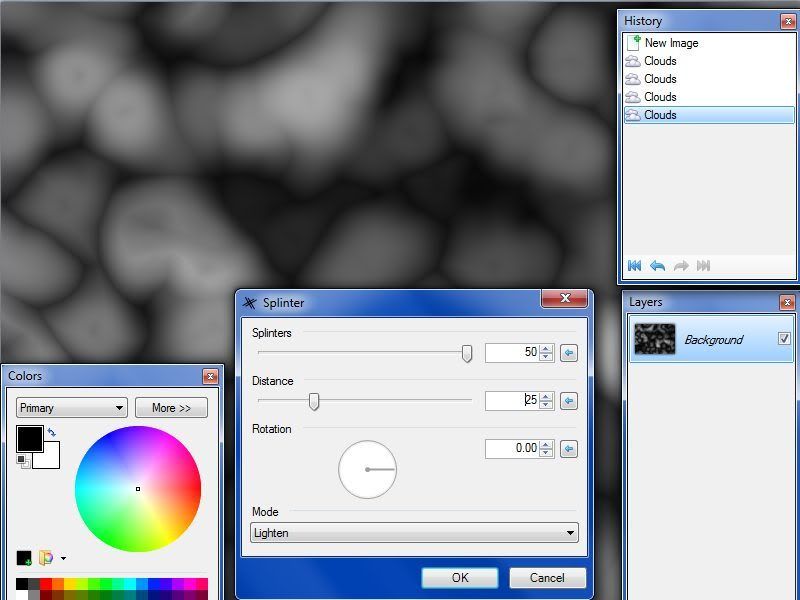
4- Apply Splinter plugin with these effects, don't forget the Lighten Mode:
5- Apply Toon plugin:

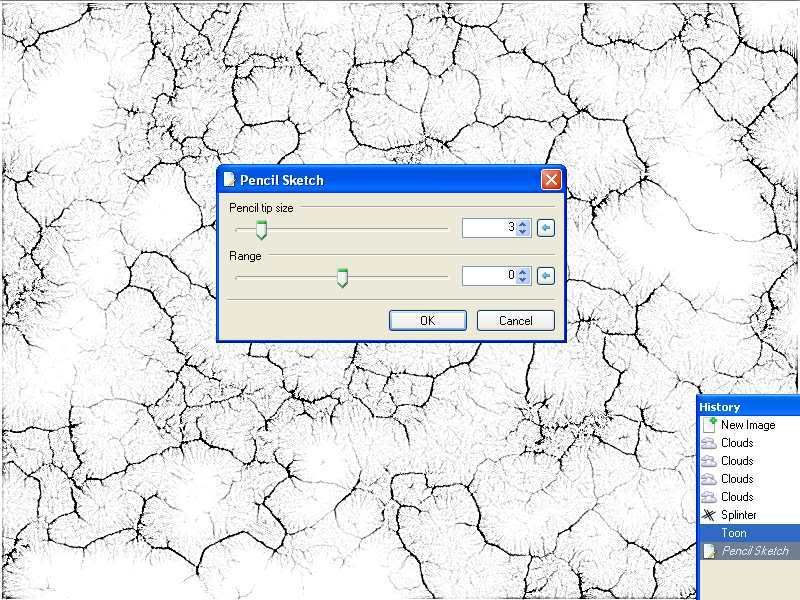
6- Pencil sketched it as desired, Effect > Artistic > Pencil sketch:
We are done, Now we have the cracks effect pattern, the following steps is just for enhancements and some different
ways of using it:
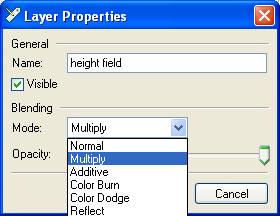
7- Duplicate layer, and set its Blend Mode to Multiply:
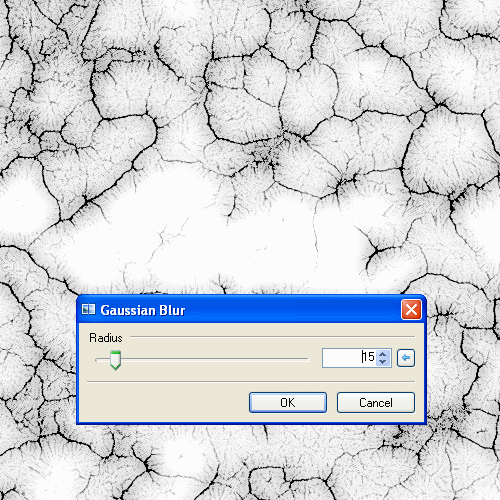
8- Gaussian Blur the top layer as desired:
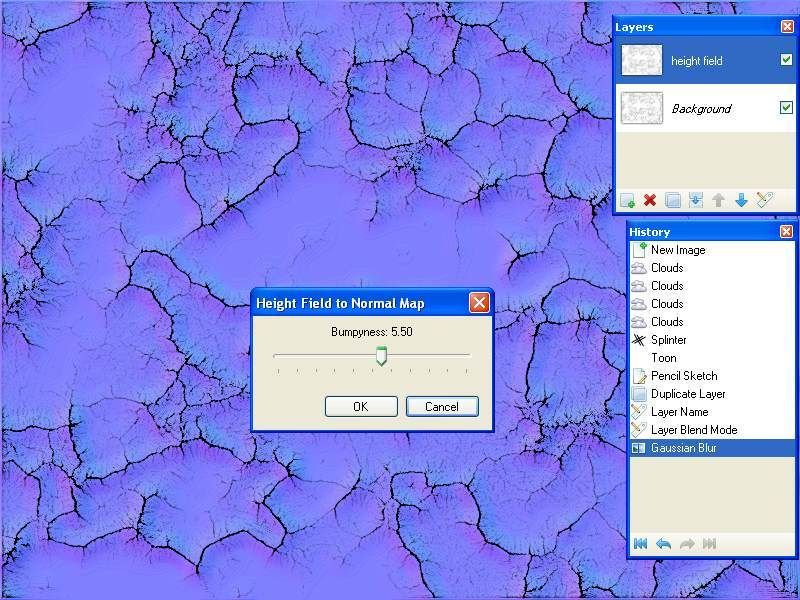
9- Apply Height Field to Normal Map on top layer (or you can use also Engrave/Emboss):
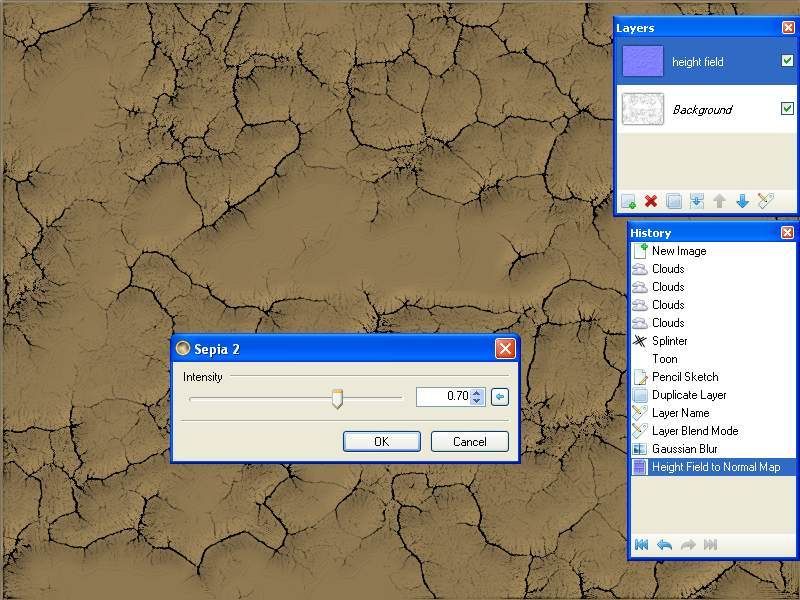
10- Sepia the top layer:
_________________________________________________________________________________
PART-2, Marble Kind Stone:
The Tutorial:
1- Cloud with these settings:
2- Repeat same Clouds 3 more time ( total 4):
3- Splinter with these settings :
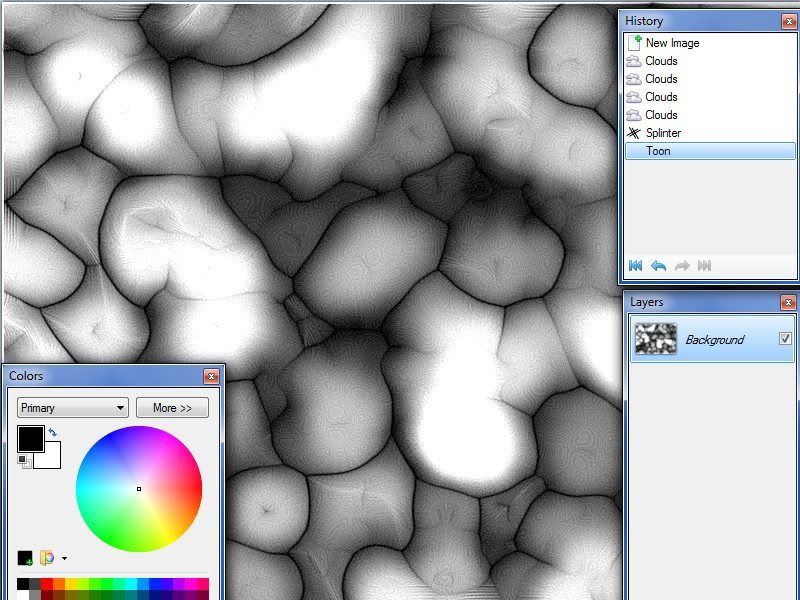
4- Apply Toon effect :

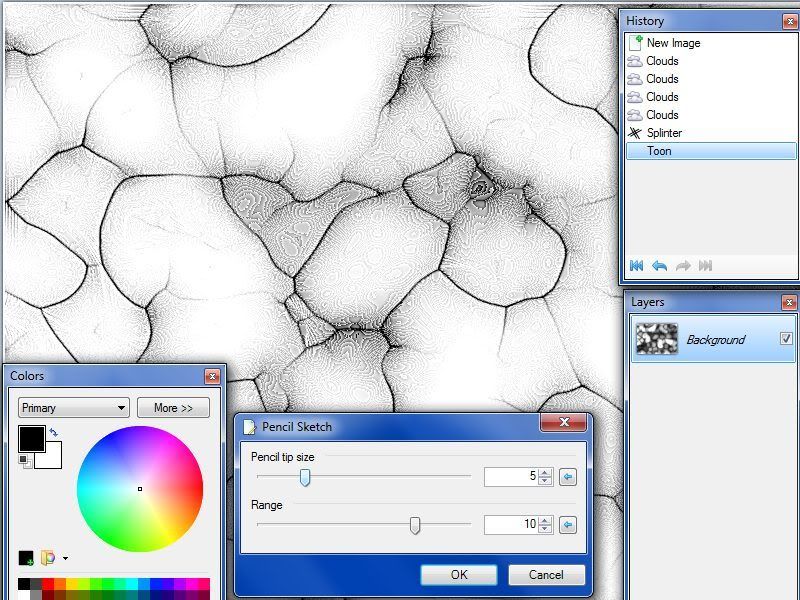
5- Pencil Sketch with these settings or as liking :
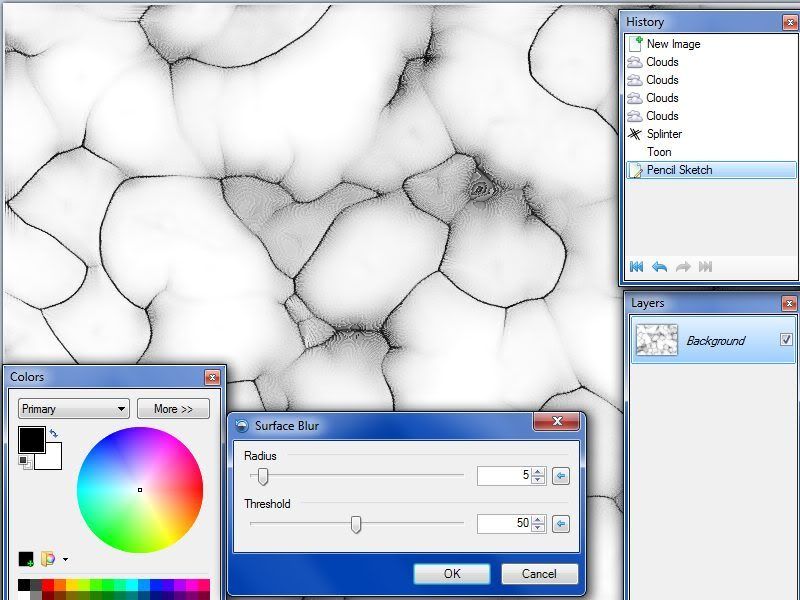
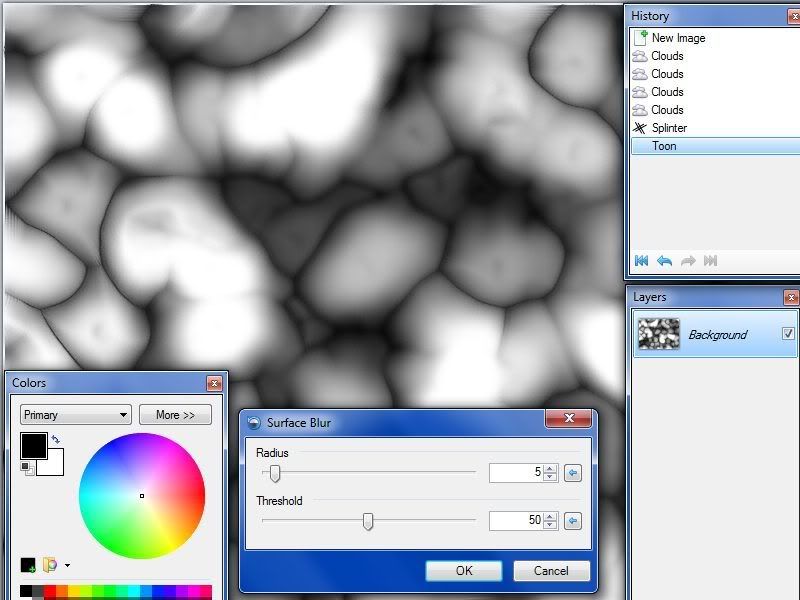
6- Surface Blur with these settings :
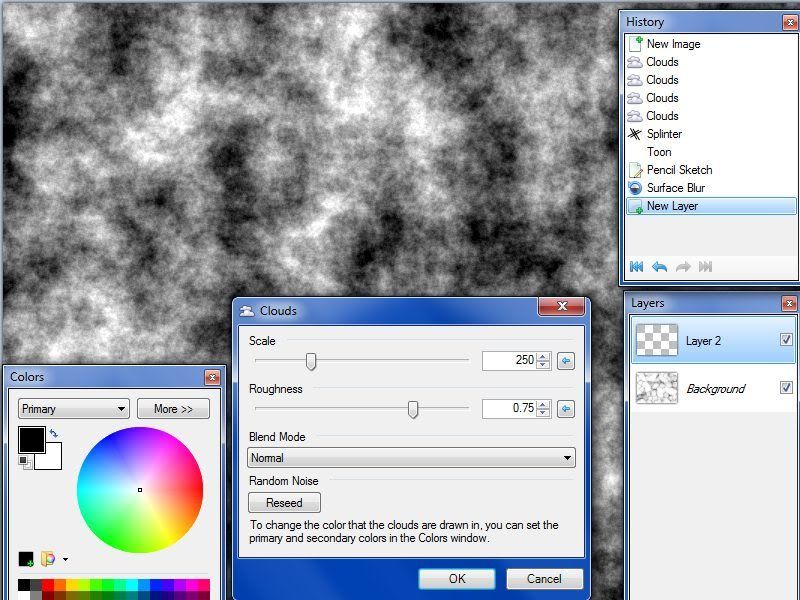
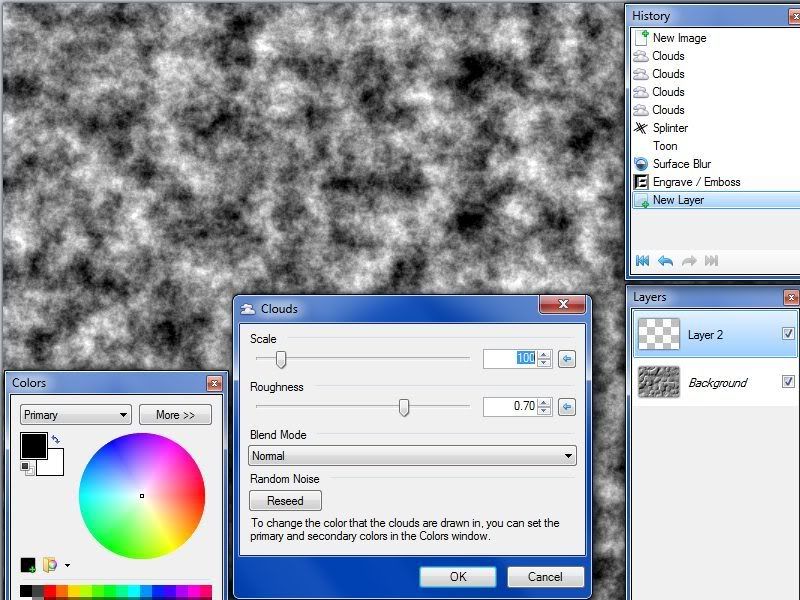
7- Add a new layer, apply Clouds with these setting ( high Roughness) :
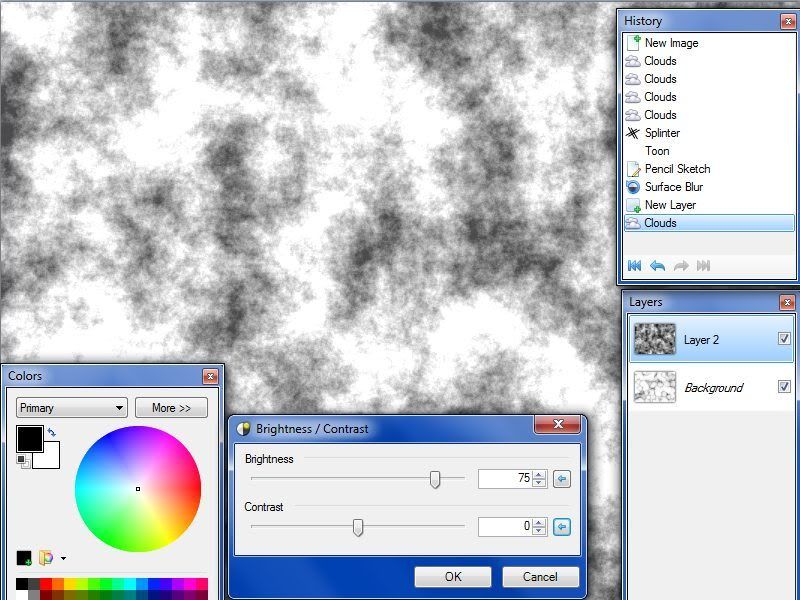
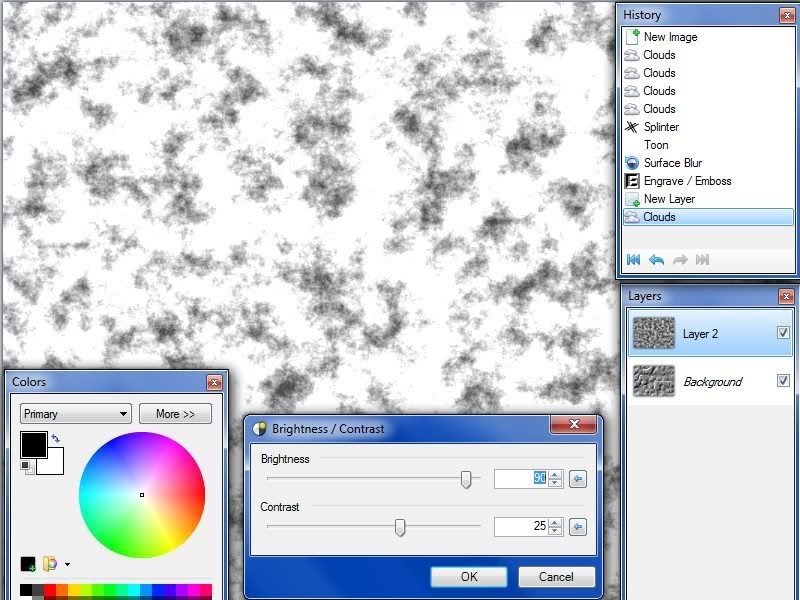
8- Add some brightness using Brightness/Contrast adjustment ( white areas will cause flat surface in the next step, so adjust as liking) :
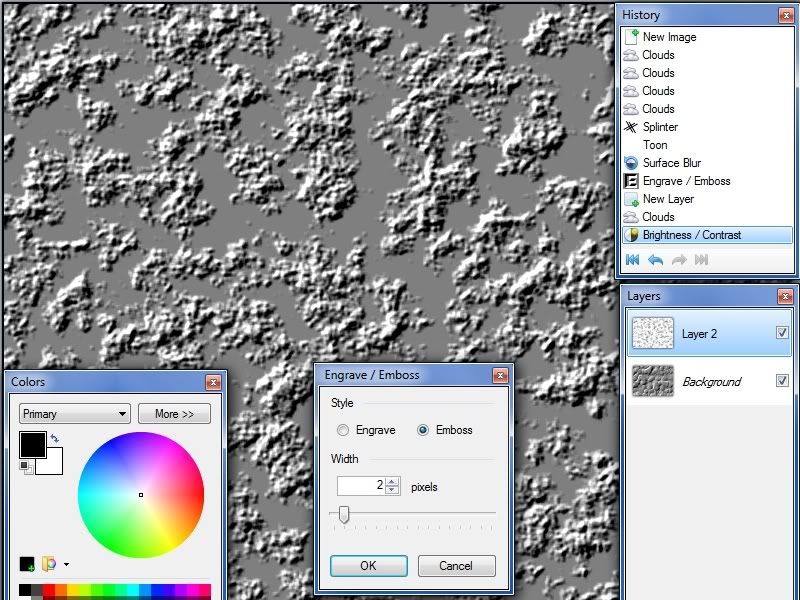
9- Apply Emboss :
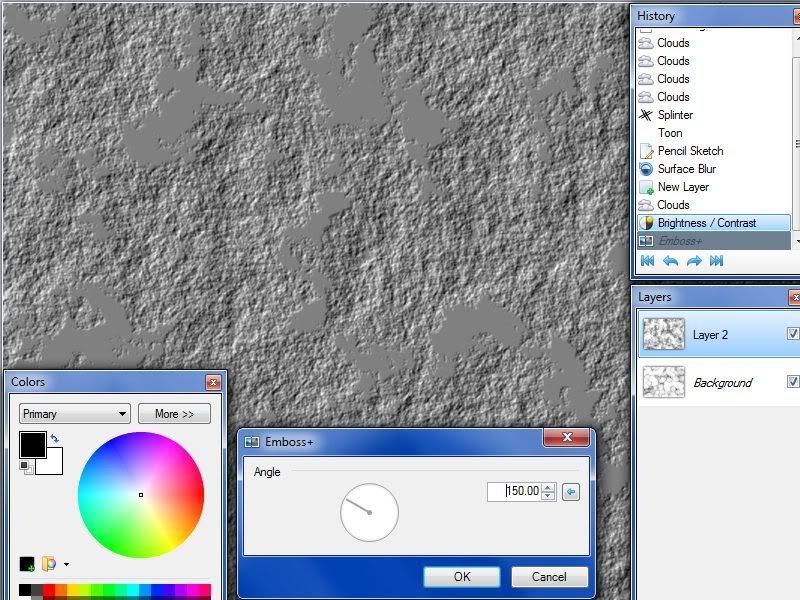
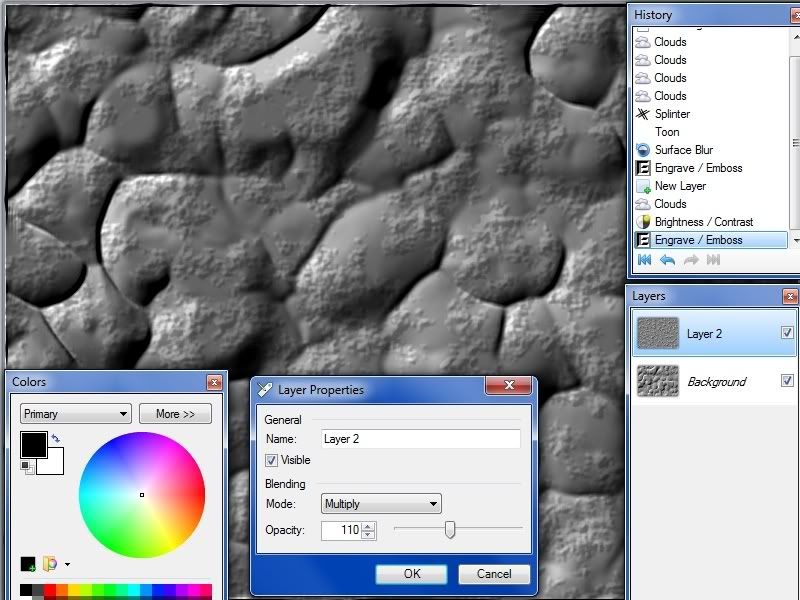
10- Open this layer properties and set the Blend Mode and Opacity as desired :
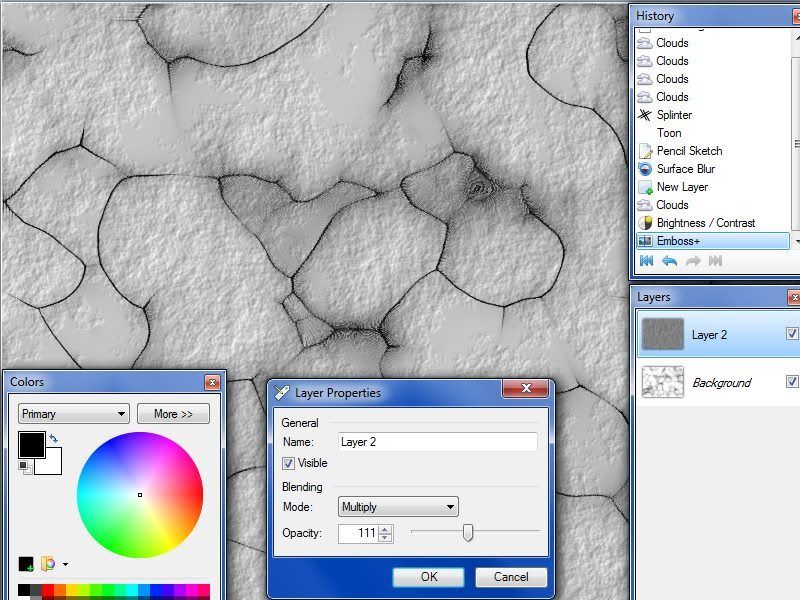
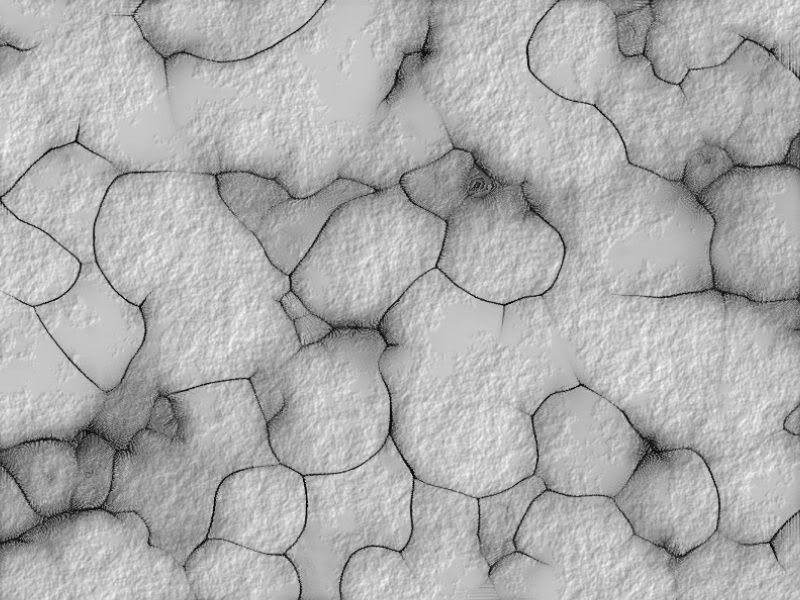
11- Flatten and tint it with any color you like, and Save :
___________________________________________________________________________________
PART-3, Bumpy Stone effect:
The Tutorial:
1- Do steps 1,2,3 and 4 in PART-2, and continue with theses steps:
2- Surface Blur with these settings :
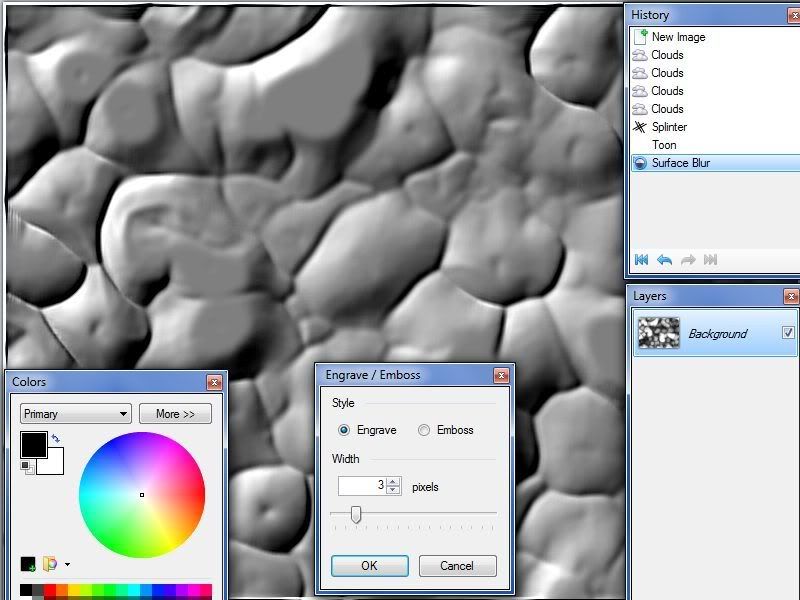
3- Apply Engrave/Emboss plugin with these settings or as you liking:
4- Add a new layer and fill it with Clouds, use smaller Scale for better result:
5- Add some brightness using Brightness/Contrast adjustment:
6- Emboss the clouds layer using Engrave/Emboss plugin :
7- Adjust the Blending Mode and Opacity of clouds layer, and merge it with the other layer :
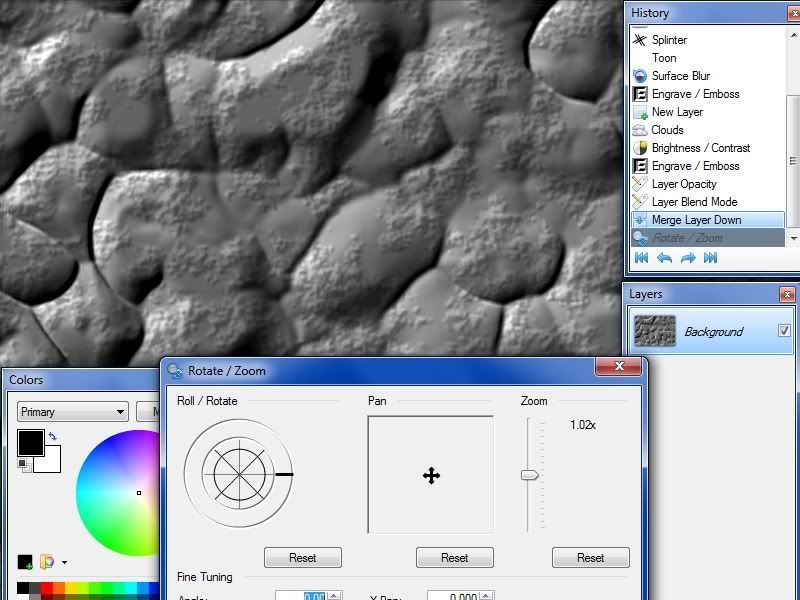
8- Zoom in the image a little bit using layer Rotate/Zoom to get rid of the edges caused by the Engrave/Emboss plugin :
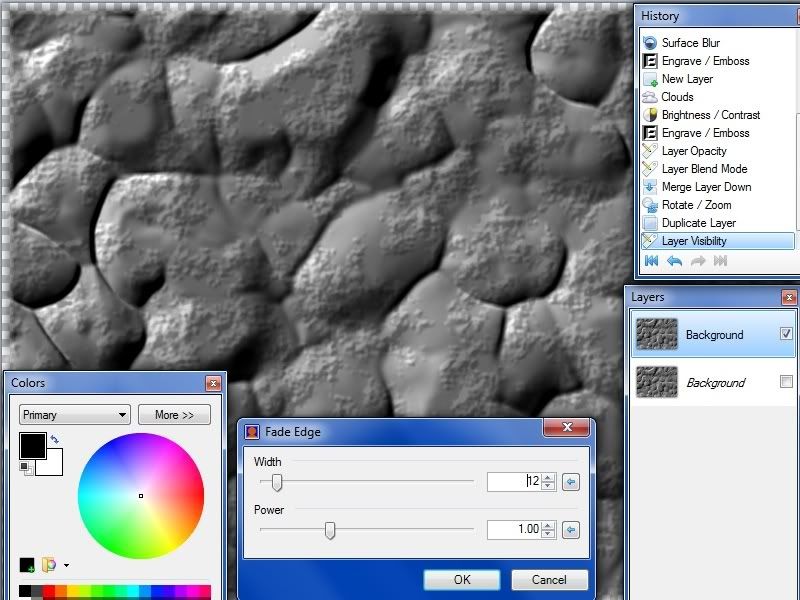
9- Duplicate the resulted layer, and fade the edges of the top layer using Fade Edge plugin with these settings :
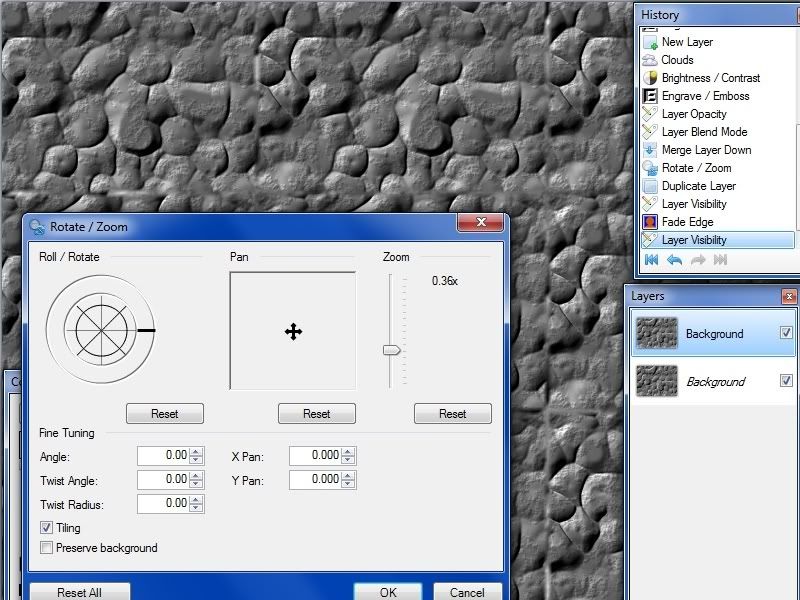
10- Open layer Rotate/Zoom and zoom out as desired after checking the Tiling option :
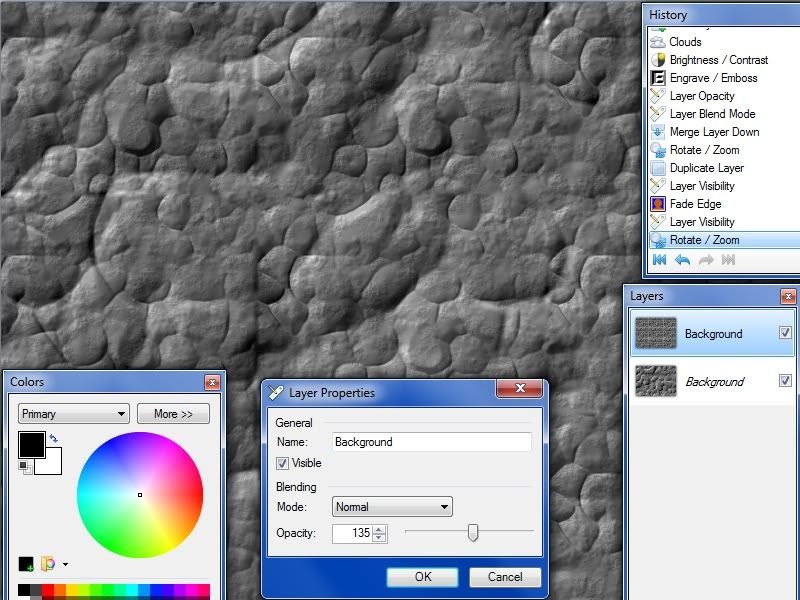
11- Adjust the Blending Mode and Opacity of the top layer as liking:
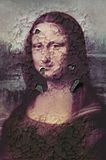
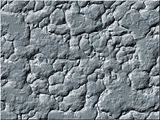
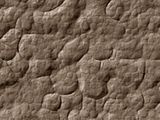
12- Apply sepia to get some thing like this.
Remember that you every time get a different result depending on the plugins/adjustment settings
This tutorial is open to your suggestions, it needs your ideas and opinions on how to improve it:
Plugins needed for this tutorial:
1- Primary plugins:
Splinter
Toon
2- Secondary plugins:
Height Field to Normal Map, sorry can't find it you can use this instead
Sepia 2
PART-1, basic crack effect:


1- Start new file 800 x 600 pix:
2- Apply clouds with Default settings using Difference Blend Mode,
3- Repeat Clouds 3 more times on same layer, so total is four:
4- Apply Splinter plugin with these effects, don't forget the Lighten Mode:
5- Apply Toon plugin:
6- Pencil sketched it as desired, Effect > Artistic > Pencil sketch:
We are done, Now we have the cracks effect pattern, the following steps is just for enhancements and some different
ways of using it:
7- Duplicate layer, and set its Blend Mode to Multiply:
8- Gaussian Blur the top layer as desired:
9- Apply Height Field to Normal Map on top layer (or you can use also Engrave/Emboss):
10- Sepia the top layer:
_________________________________________________________________________________
PART-2, Marble Kind Stone:


The Tutorial:
1- Cloud with these settings:
2- Repeat same Clouds 3 more time ( total 4):
3- Splinter with these settings :
4- Apply Toon effect :
5- Pencil Sketch with these settings or as liking :
6- Surface Blur with these settings :
7- Add a new layer, apply Clouds with these setting ( high Roughness) :
8- Add some brightness using Brightness/Contrast adjustment ( white areas will cause flat surface in the next step, so adjust as liking) :
9- Apply Emboss :
10- Open this layer properties and set the Blend Mode and Opacity as desired :
11- Flatten and tint it with any color you like, and Save :
___________________________________________________________________________________
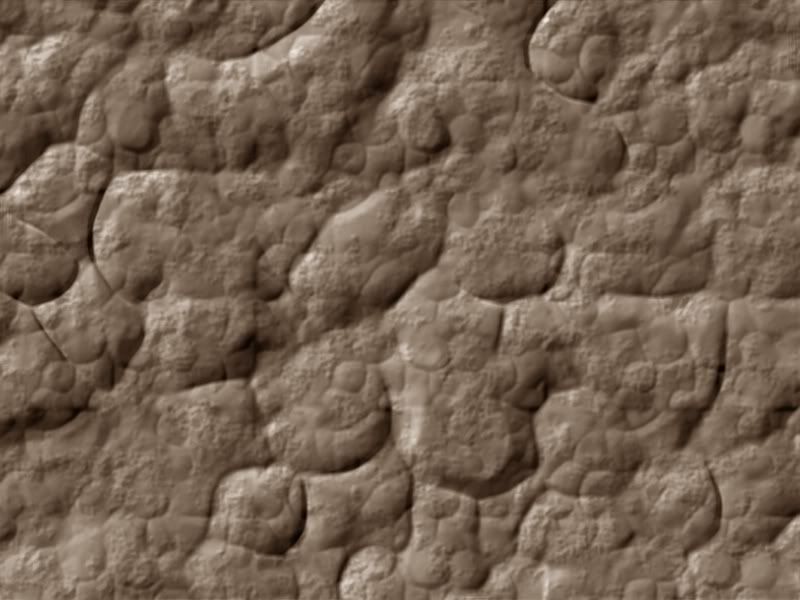
PART-3, Bumpy Stone effect:


The Tutorial:
1- Do steps 1,2,3 and 4 in PART-2, and continue with theses steps:
2- Surface Blur with these settings :
3- Apply Engrave/Emboss plugin with these settings or as you liking:
4- Add a new layer and fill it with Clouds, use smaller Scale for better result:
5- Add some brightness using Brightness/Contrast adjustment:
6- Emboss the clouds layer using Engrave/Emboss plugin :
7- Adjust the Blending Mode and Opacity of clouds layer, and merge it with the other layer :
8- Zoom in the image a little bit using layer Rotate/Zoom to get rid of the edges caused by the Engrave/Emboss plugin :
9- Duplicate the resulted layer, and fade the edges of the top layer using Fade Edge plugin with these settings :
10- Open layer Rotate/Zoom and zoom out as desired after checking the Tiling option :
11- Adjust the Blending Mode and Opacity of the top layer as liking:
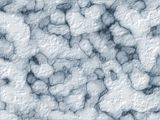
12- Apply sepia to get some thing like this.
Remember that you every time get a different result depending on the plugins/adjustment settings


 !
!