|
|
Post by blanco111 on Jun 10, 2011 22:29:39 GMT
I've done the great tut by SargonIII at least a couple of times. As suggested in the tut as an option, I placed an object next to the tut and attempted to make a realistic reflection of it on the orb. After some reflection (pun?), I realized the reflection on the orb might not be correct as in angle, size, etc. Anyone know of a site on the web where I could see examples of how objects (with right and left sides) placed next to an orb should be correctly reflected on it? I looked to no avail... www.pdnfanatics.com/make-a-glass-gloss-orb-t603.html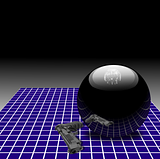 How would I go about changing the angle of the reflection? I'm assuming it's wrong after looking in a mirror, etc. |
|
|
|
Post by Sargon III on Jun 11, 2011 7:44:43 GMT
Well, it is not easy to create a reflection for an object with a correct angle in a 2D graphic application (mirroring), especially for the unsymmetrical objects or shapes, like the one you placed in your image, because you need to rotate the object to show the other side or a different side, unless if you have an ability to imagine how it will look like in the mirror and draw it up manually using a 2D program, but that is really very hard to achieve for complex shapes. I will try to explain what I am trying to say with these simple tutorial using Google SketchUp and PDN, this effect has a term in the graphic design but I really can't remember what they call it. Anyways, first thing you have to have a 3D object that you can rotate it around. Place it where you want in the canvas, then duplicate it, flip it and rotate it to the desired angle and place it beside the first one, or just mirror it if you have this option. In this image, I created this simple house in SKU then duplicated it, moved it, flipped it and rotated it, as it is like a reflection of my house in an imaginary mirror, if that make sense.  See the Imaginary mirror: 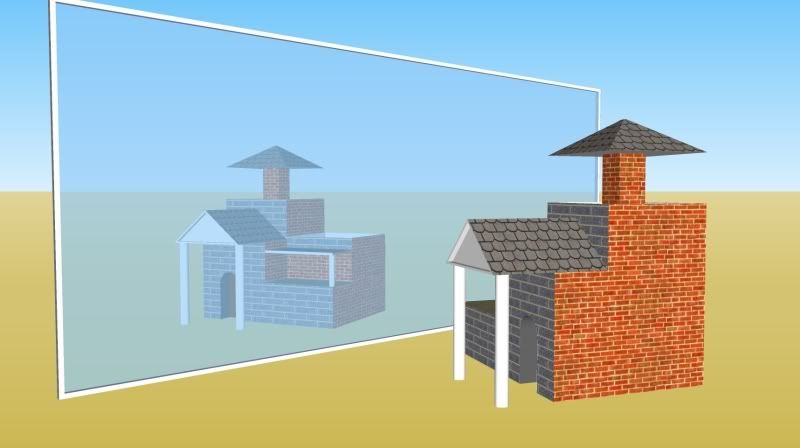 And this from top view, the black line is the mirror: 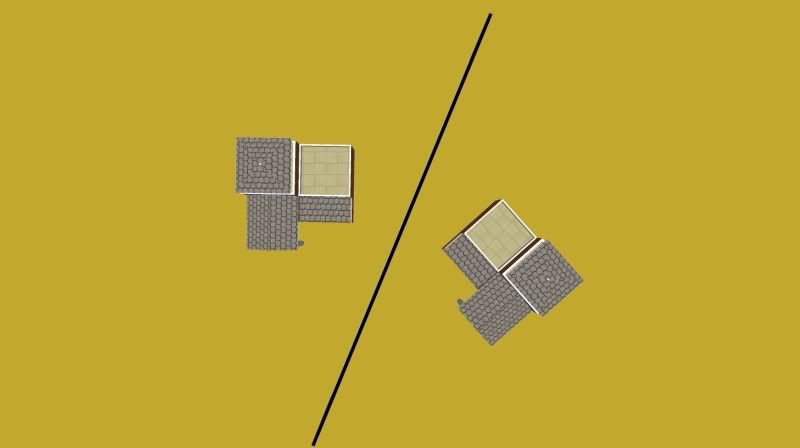 Then I exported two images, one for each house, just by hiding one house and save the work as 2D. First image, to use it as a background: 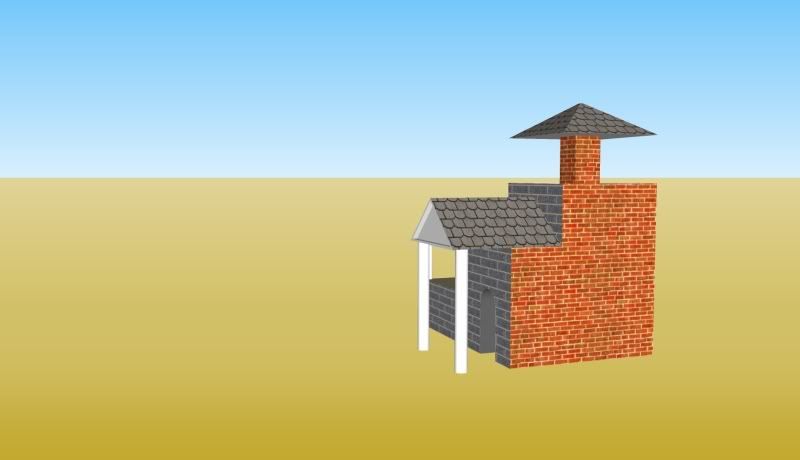 second image, for Shape 3D plugin: 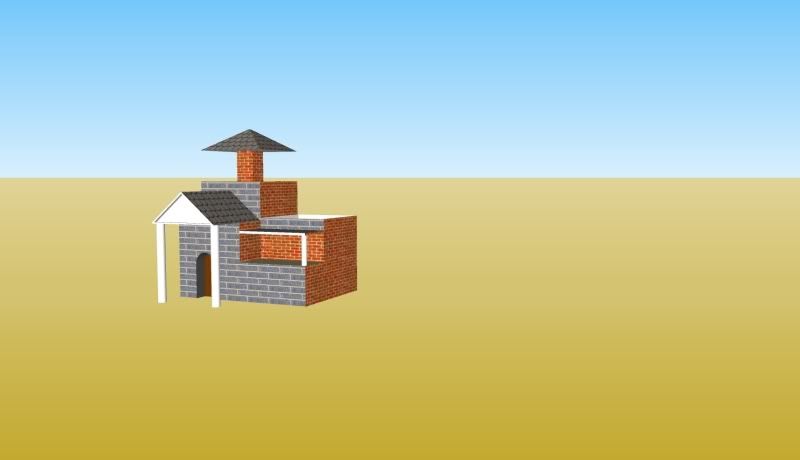 Then I used these 2 images as 2 layers in PDN one as a background, and on the other one I applied Shape-3D, and with some additional effects I got this: It is not exactly correct, but something close: 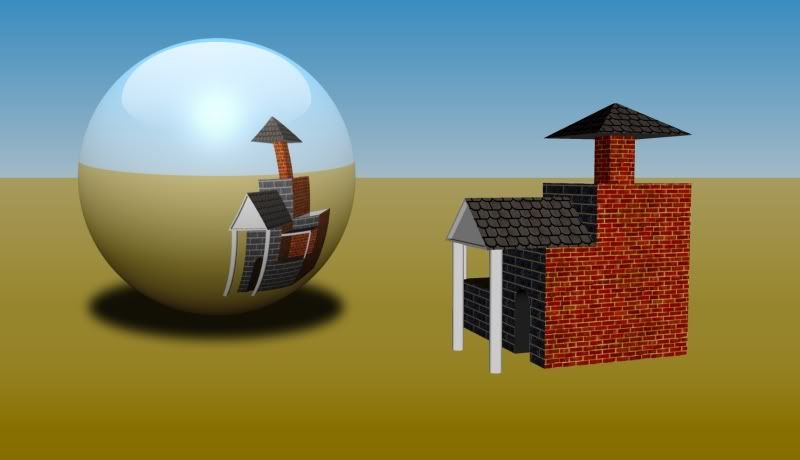 Hope it is helpful. |
|
|
|
Post by blanco111 on Jun 11, 2011 22:24:56 GMT
Thanks for responding. I had never heard of Sketchup. But then again, I had never heard of Sculptris and Anim8or either before reading about them somewhere on this web site. I checked out the Introductory video for Sketchup and was very impressed. But I think I want to stay with Paint.net until I run out of tutorials to do. I learn something new every day. Anyway, the house in your example is more complicated to reflect than my gun, isn't it? The gun only shows one of two sides (the other side being in contact with the table) Anyway, I used Perspective and TubeOblique to distort the reflection in another attempt with your tut and I'm happy enough with the result. But since you were generous enough to answer my question, I have another question about one of your other tutorials: Making a 3D Crystal Stone (Gem) / Video Tutorial - Making the 3D Effect (Part 2) www.pdnfanatics.com/making-a-3d-crystal-stone-gem-video-tutorial-t457.html I did Part One, but the Part 2 video begins with a gem already rendered. How do I make that gem so I can follow the rest of the tut video? It's not the gem produced by following the Part 1 tut video. |
|
|
|
Post by TheBad1 on Jun 11, 2011 22:30:13 GMT
@ Sargon' ... wow, wot a gr8 mini-tut. Very impressive. Inspirationally, perspectively brilliant once again @ blanco' ... that looks cool. Nice pun  BTW ... some shadow under the pistol would benefit it  |
|
|
|
Post by Sargon III on Jun 12, 2011 2:05:46 GMT
Welshy, thank you very much. You welcome blanco111, the house is a 3D object, I can rotate it and see all sides, it was just a quick drawing for the tut. The word side of the gun here means the side that is facing the sphere, which is in this case is the bottom of the gun, not the bottom of the gun in your picture, but the bottom of the gun when holding it in hand. In this example, I put the 3D gun in same position as yours, and in the reflection I showed the bottom side ( not the side that is contact with the floor): See how the reflection is showing the bottom of the grip, the trigger guard and the black slider: 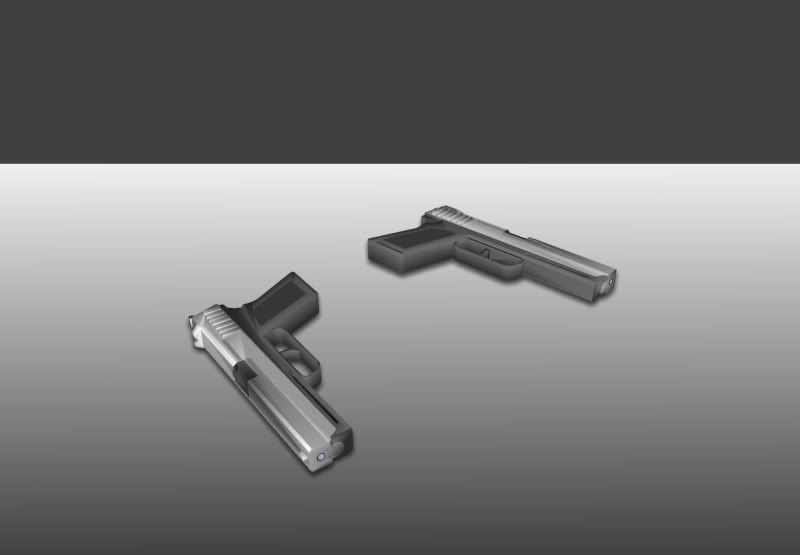 And after shape 3D:  BTW the gun is from Google 3D warehouseAnd your question about the gem part-2, believe me it is the same tutorial in part-1, I just played with Polygones settings, changed the Starisation to 6, and left the center of the gem empty, then filled all areas with the gradient tool: 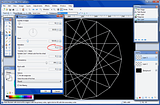 |
|
|
|
Post by blanco111 on Jun 12, 2011 3:28:53 GMT
The adage "A picture is worth a thousand words." certainly applies here. Once I saw your images, I understood what you meant. Very instructive. It'll be awhile before I'll be ready to tackle a 3
D program like Sketchup. Thanks for the info about the gem tut. I had no idea. I'll have to try and make that initial gem with the Polygon settings you've shown here.
Thanks for your input too, WelshBlue. I did put some shadow under the gun. I think it needs more now that you mention it. But the reflection is all wrong, anyway...
|
|