Post by Pixey on Sept 24, 2011 14:22:29 GMT
Creating Manga/Anime in Paint.NET (Updated)
This tutorial assumes a basic knowledge of how to use Paint. NET,
i.e. the use of plug-ins, layer properties, use of Lasso and Smudge, plus the merging of layers.
Plug-ins used are:
Smudge
Feather
AA’s Assistant
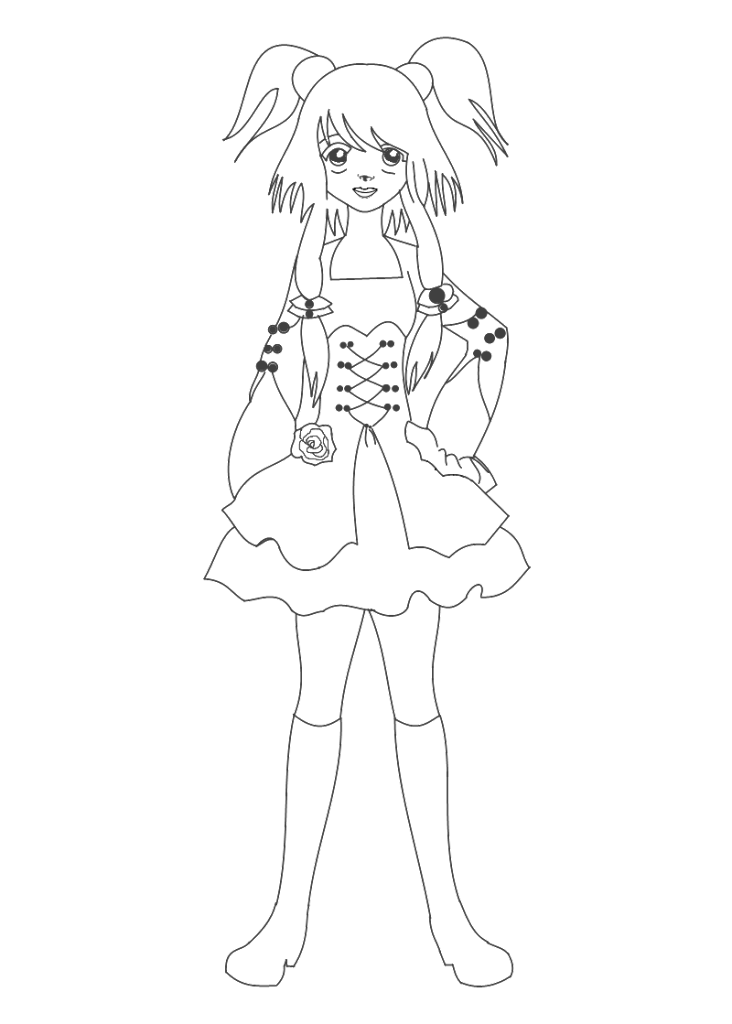
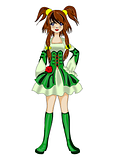
Firstly, one needs a Manga/Anime outline. You can either draw one and scan it into your computer and into Paint.NET, or trace around something that you have uploaded from the Web. For this tutorial I will supply a Manga outline of my own. Just right click on the Manga and ‘Save As’ to your computer. Then open up Paint and load it into a new layer to begin.
Here are a few tips, which I hope may be helpful. Making this type of image is time-consuming and one needs a lot of patience. There may be easier ways to do this – but I’ve yet to find out how.
Always check which layer you are on. There is nothing worse than spending 15 minutes colouring something, only to find you have been on the wrong layer and then have to undo it all. Also – save often – especially after you have satisfactorily
completed a stage. That way, if you start on the next step, and mess up, then all you need to do is exit Paint.Net and go back to the last saved version.
In this tutorial you can colour the hair/clothes/etc., with Paintbrush or the Lasso tool, which I like. But, it requires practice. You can use it with the Ctrl & Alt held down, so that you can ‘select’ various pieces all at once. As long as you don’t “de-select” (Ctrl D) then everything you Lasso stays ‘alive’ until you bucket fill and de-select when you are done. Sometimes you can get ahead of the Lasso, and need to wait for it to catch up, especially on larger areas.
There are various ways to colour your image. You could have each colour on a different layer and then merge the layers together. For this tutorial the colouring will be done on ONE layer, called The Base Colour.
Step 1. Upload the Manga outline. This will automatically set the size for your layer, which will be around 800 x 1119. If this is too big for your monitor, you can change the size by going to Image/Resize and select the %.
Step 2. Make a New Layer and set it to MULTIPLY mode. Call it Base Colour.
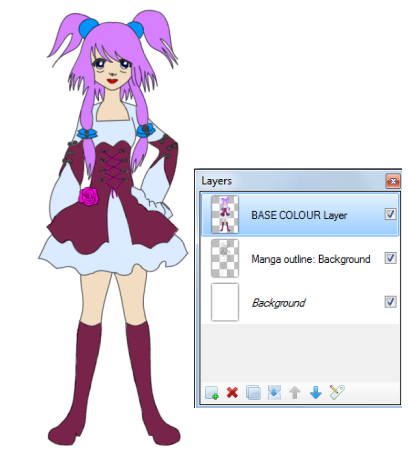
On this layer colour the Manga, either by using the Paintbrush, or by Lasso Tool.
You can choose your own colours, or stick with the ones in the tutorial.
When colouring goes over into another colour (as we’ll be using one Base Layer) the eraser cannot be used. Instead you can use the colour picker to get the exact same colour you have gone “into” and then use it with the paintbrush tool to erase where the colour overlaps.
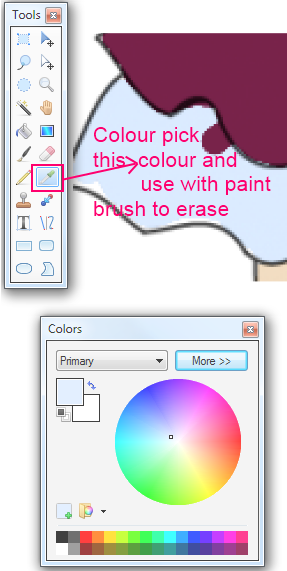
Colours used in the tutorial are:
Skin – F2DDC2
Hair – D67FFF
Blouse & Underskirt – DBEBFF
Overskirt & Boots – 78234A
Eyes – 000A45, Brows – dark grey & highlights in white
Hair Bobbles & Ribbons – 0094FF
Bodice lace-up Ribbons & Flower – FF00DC
Lips – FF0000
To select the areas to colour, the Lasso Tool is quite useful for tight spots, as well as for doing large areas, as one can get quite close to the black outlines. If you hold down Ctrl and Alt at the same time and use the Lasso you can select more than one area, as it will stay active.
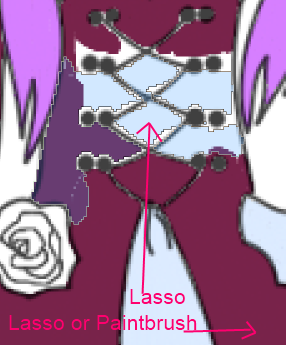
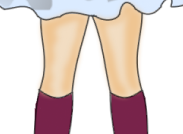
Step 3. New Layer – with Colour EFC592 – add shading to the skin with paintbrush on her face and legs. Gaussian Blur at between 4 – 6. If you like the Smudge Tool, you can use that to further smooth out the edges on any of the shadow areas in this tutotrial.
Then “Merge Down” onto Base Colour Layer
Step 4. New Layer for Hair Shadow – colour 570075 – using the Line/Curve Tool – begin to add shapes of shadow to the hair. After this you can use the Hue & Saturation in Adjustments, to get a nicer colour.
Then “Merge Down” onto Base Colour Layer
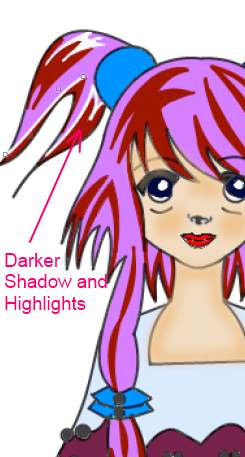
Step 5. New Layer for Highlights and, with Line/Curve Tool, as before, draw lines around the darker shades, like you did in the last step.
“Merge Down” onto the Base layer.
Step 6. On the Base Colour Layer with Magic Wand set to 20% tolerance, click on (select) the Bobbles and the Ribbons until they are ‘active’. Then go to Effects/Noise and lower the level to 50.
Step 7. New Layer for Blouse Shadows & Underskirt, in primary colour 808080 and secondary colour to white/transparent. With the Lasso tool select areas and then use Linear Gradient to fill. You could also just draw these shadows with Line/Curve and fill, or simply use Paintbrush.
When done, use the plug-in, Effects/Object/ Feather at default.
“Merge Down” onto the Base Colour Layer.
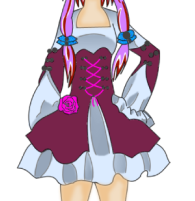
Step 8. New Layer for a darker outline to the shadows you made, above. With Line/Curve
Tool, and Style to ‘rounded ’, draw lines to the sides of the shadows and “taper off” the lines at each end. Reduce the opacity of the lines until you get a nice outline.
“Merge Down” onto the Base Colour Layer.
Step 9. New Layer for darker shading to the Dress and Boots, in colour 3D001C, either with the Lasso Tool and Bucket Fill, or draw with Paintbrush. When done Gaussian Blur at default.
“Merge Down” onto Base Colour Layer.
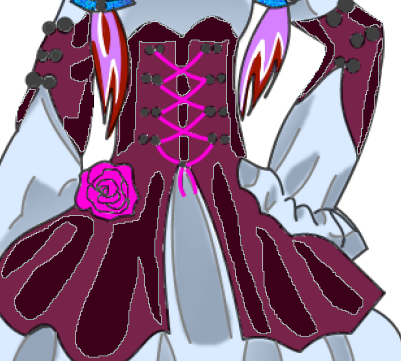
Step 10. New Layer for white highlights to be placed on the sides of the shadows you have just made previously. Line Curve at #2, style ‘rounded’. Reduce opacity for a nice outline.
“Merge Down” onto Base Colour Layer.
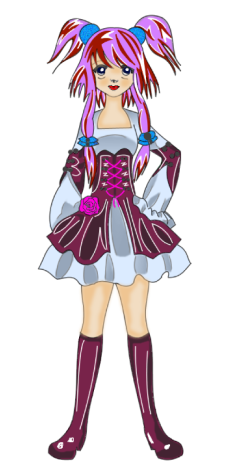
Step 11. New Layer for thicker White Lines on the Dress and Boots with the Line/Curve Tool
At between size 6 – 8 and white to transparency of 95%. Gaussian Blur @ 10 and set the layer opacity to about 189.
“Merge Down” to Base Colour Layer.
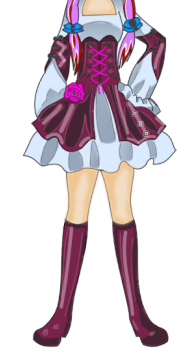
Step 12. New Layer. On this layer use a darker colour to add lines to the shading on the boots, to give them some definition around the heel/boot/toe area.
“Merge Down” to Base Colour Layer.
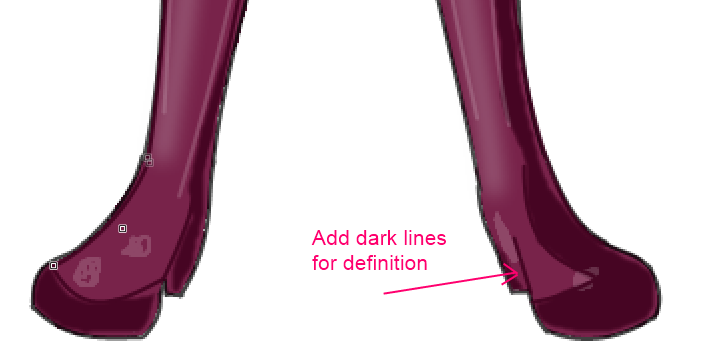
Step 13. Duplicate the Manga Outline layer and in Effects/Colour – Colour Flip/Rotate,
Choose a colour of you liking for your Manga’s outline.
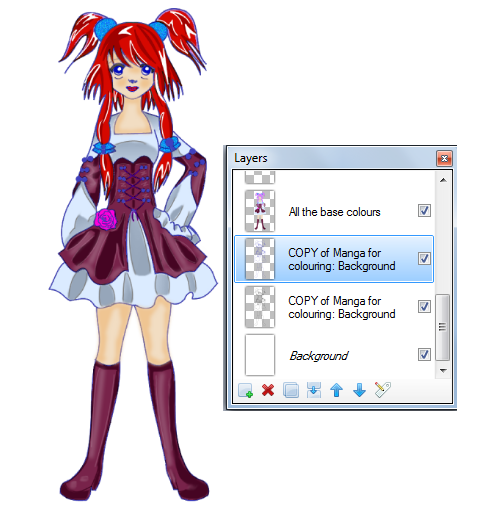
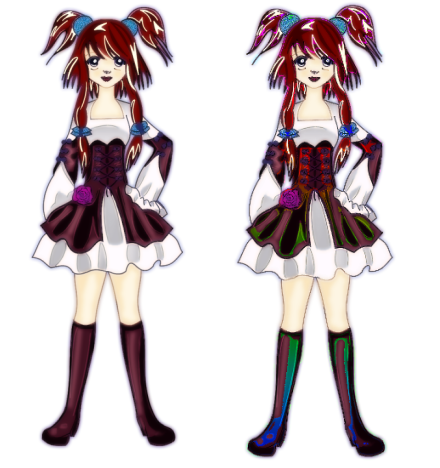
Step 14. I decided, at the end, that I was not happy with the main hair colour. Luckily, there is the Base Colour Layer, which will help to change this. Use the shift key and the Magic Wand to select the hair with Tolerance at around 20%, which will become active. Make a New Layer and add a new colour. Play with the Adjustments/Hue & Saturation/Curves etc., until you get something you like.
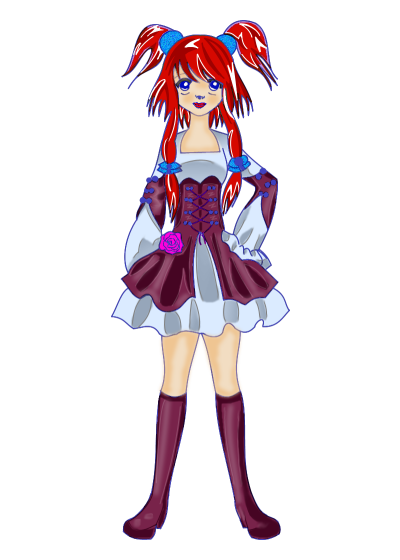
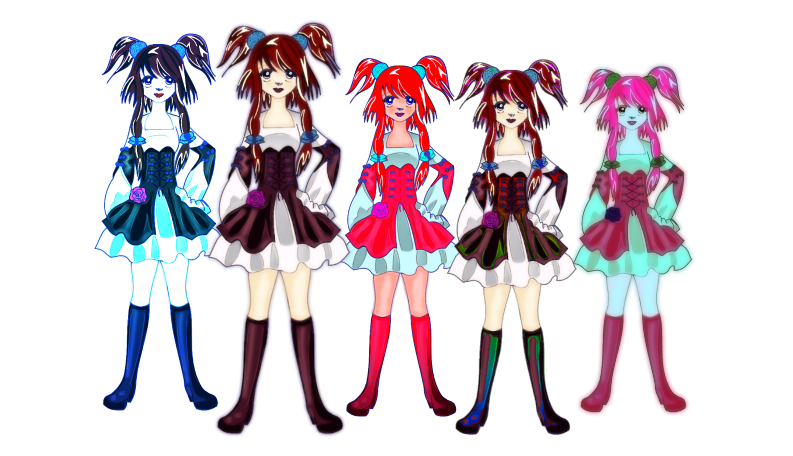
Step 15. To conclude, I un-checked the white Background Layer, then used Image – Flatten all the layers. I saved the Manga without the background, Duplicated it, and then played with the Layer Modes/Adjustments, Photo Effects, Curves, etc., which can give some very interesting results. Good Luck!

This tutorial assumes a basic knowledge of how to use Paint. NET,
i.e. the use of plug-ins, layer properties, use of Lasso and Smudge, plus the merging of layers.
Plug-ins used are:
Smudge
Feather
AA’s Assistant
Firstly, one needs a Manga/Anime outline. You can either draw one and scan it into your computer and into Paint.NET, or trace around something that you have uploaded from the Web. For this tutorial I will supply a Manga outline of my own. Just right click on the Manga and ‘Save As’ to your computer. Then open up Paint and load it into a new layer to begin.
Here are a few tips, which I hope may be helpful. Making this type of image is time-consuming and one needs a lot of patience. There may be easier ways to do this – but I’ve yet to find out how.
Always check which layer you are on. There is nothing worse than spending 15 minutes colouring something, only to find you have been on the wrong layer and then have to undo it all. Also – save often – especially after you have satisfactorily
completed a stage. That way, if you start on the next step, and mess up, then all you need to do is exit Paint.Net and go back to the last saved version.
In this tutorial you can colour the hair/clothes/etc., with Paintbrush or the Lasso tool, which I like. But, it requires practice. You can use it with the Ctrl & Alt held down, so that you can ‘select’ various pieces all at once. As long as you don’t “de-select” (Ctrl D) then everything you Lasso stays ‘alive’ until you bucket fill and de-select when you are done. Sometimes you can get ahead of the Lasso, and need to wait for it to catch up, especially on larger areas.
There are various ways to colour your image. You could have each colour on a different layer and then merge the layers together. For this tutorial the colouring will be done on ONE layer, called The Base Colour.
Step 1. Upload the Manga outline. This will automatically set the size for your layer, which will be around 800 x 1119. If this is too big for your monitor, you can change the size by going to Image/Resize and select the %.

Step 2. Make a New Layer and set it to MULTIPLY mode. Call it Base Colour.

On this layer colour the Manga, either by using the Paintbrush, or by Lasso Tool.
You can choose your own colours, or stick with the ones in the tutorial.
When colouring goes over into another colour (as we’ll be using one Base Layer) the eraser cannot be used. Instead you can use the colour picker to get the exact same colour you have gone “into” and then use it with the paintbrush tool to erase where the colour overlaps.

Colours used in the tutorial are:
Skin – F2DDC2
Hair – D67FFF
Blouse & Underskirt – DBEBFF
Overskirt & Boots – 78234A
Eyes – 000A45, Brows – dark grey & highlights in white
Hair Bobbles & Ribbons – 0094FF
Bodice lace-up Ribbons & Flower – FF00DC
Lips – FF0000
To select the areas to colour, the Lasso Tool is quite useful for tight spots, as well as for doing large areas, as one can get quite close to the black outlines. If you hold down Ctrl and Alt at the same time and use the Lasso you can select more than one area, as it will stay active.

Step 3. New Layer – with Colour EFC592 – add shading to the skin with paintbrush on her face and legs. Gaussian Blur at between 4 – 6. If you like the Smudge Tool, you can use that to further smooth out the edges on any of the shadow areas in this tutotrial.
Then “Merge Down” onto Base Colour Layer

Step 4. New Layer for Hair Shadow – colour 570075 – using the Line/Curve Tool – begin to add shapes of shadow to the hair. After this you can use the Hue & Saturation in Adjustments, to get a nicer colour.
Then “Merge Down” onto Base Colour Layer

Step 5. New Layer for Highlights and, with Line/Curve Tool, as before, draw lines around the darker shades, like you did in the last step.
“Merge Down” onto the Base layer.
Step 6. On the Base Colour Layer with Magic Wand set to 20% tolerance, click on (select) the Bobbles and the Ribbons until they are ‘active’. Then go to Effects/Noise and lower the level to 50.
Step 7. New Layer for Blouse Shadows & Underskirt, in primary colour 808080 and secondary colour to white/transparent. With the Lasso tool select areas and then use Linear Gradient to fill. You could also just draw these shadows with Line/Curve and fill, or simply use Paintbrush.
When done, use the plug-in, Effects/Object/ Feather at default.
“Merge Down” onto the Base Colour Layer.

Step 8. New Layer for a darker outline to the shadows you made, above. With Line/Curve
Tool, and Style to ‘rounded ’, draw lines to the sides of the shadows and “taper off” the lines at each end. Reduce the opacity of the lines until you get a nice outline.
“Merge Down” onto the Base Colour Layer.
Step 9. New Layer for darker shading to the Dress and Boots, in colour 3D001C, either with the Lasso Tool and Bucket Fill, or draw with Paintbrush. When done Gaussian Blur at default.
“Merge Down” onto Base Colour Layer.

Step 10. New Layer for white highlights to be placed on the sides of the shadows you have just made previously. Line Curve at #2, style ‘rounded’. Reduce opacity for a nice outline.
“Merge Down” onto Base Colour Layer.

Step 11. New Layer for thicker White Lines on the Dress and Boots with the Line/Curve Tool
At between size 6 – 8 and white to transparency of 95%. Gaussian Blur @ 10 and set the layer opacity to about 189.
“Merge Down” to Base Colour Layer.

Step 12. New Layer. On this layer use a darker colour to add lines to the shading on the boots, to give them some definition around the heel/boot/toe area.
“Merge Down” to Base Colour Layer.

Step 13. Duplicate the Manga Outline layer and in Effects/Colour – Colour Flip/Rotate,
Choose a colour of you liking for your Manga’s outline.

Step 14. I decided, at the end, that I was not happy with the main hair colour. Luckily, there is the Base Colour Layer, which will help to change this. Use the shift key and the Magic Wand to select the hair with Tolerance at around 20%, which will become active. Make a New Layer and add a new colour. Play with the Adjustments/Hue & Saturation/Curves etc., until you get something you like.

Step 15. To conclude, I un-checked the white Background Layer, then used Image – Flatten all the layers. I saved the Manga without the background, Duplicated it, and then played with the Layer Modes/Adjustments, Photo Effects, Curves, etc., which can give some very interesting results. Good Luck!


 "]
"]



 One minute they work .... the next they do not

