Post by aislin on Jan 24, 2012 13:40:47 GMT
First you start with finding a gooooood res and quality picture on
Pimp my PIC UP or
SL Picture Pile Ups or
Pile up Only
just go through the pics and if you find one which you like, click with your right mouse on it and you can enlarge it (to the largest res), copy and past it into PDN.
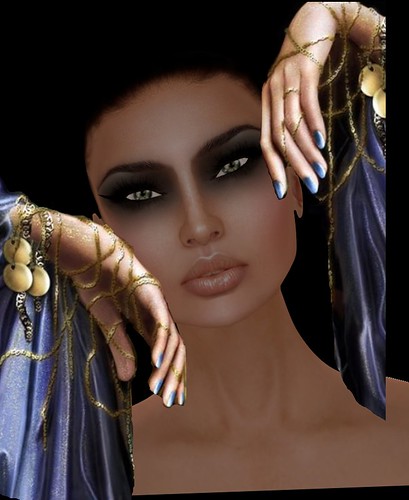
I used this one

get the wand, select the background and delete it.
Most of the time I add a new layer as background and just simply make it black.
Add new layer, line tool and color black, just line around the model to remove sharp corners etc.
Next I googled for some pictures, see what looked nice on this model and found this pic: sadly I can't remember where I found it... somewhere on Google, hahaha
Add a new layer and add the right hand (with some sleeve)put it in the right position. Add a new layer and add the left hand and put it in the right position.

!Make sure the hands are cut perfectly, maybe enlarge it a bit if it's necessary, but make sure it won't look pixelated. You can now merge layer down so the 2 layers with the hands are now one.!
If you duplicate the hand layer, get the wand and select the transparancy in the bottom 'handlayer' ctrl-I and paint the hands black, so you have the normal colored hands on top and the black underneath. now you can move the black hands layer cause they are the hand shadows, in the position you like. Make sure that in a later stage where you add other shadows, the will go in the same direction. Set gaussian blur at something between 2 and 6, layer properties - reflect.
If you'd like to know how exactly I did the shadows, just look at my other tutorial: painting a hand (link will be posted as soon as possible).
so, now you have the layers:
black background
basic model
black lines around the model to make it sharp
hands shadows
hands
Now we add a layer on top of the hands and paint black around the face, more around the forehead than around the shoulders. Gaussian blur as much as you like I did that around 60 or 65.
To add shadow under the chin you create a new layer on top of the basic layer, make the shape of the shadow with the line tool and color it black, gaussian blur between 2 and 5. Layer property - reflect
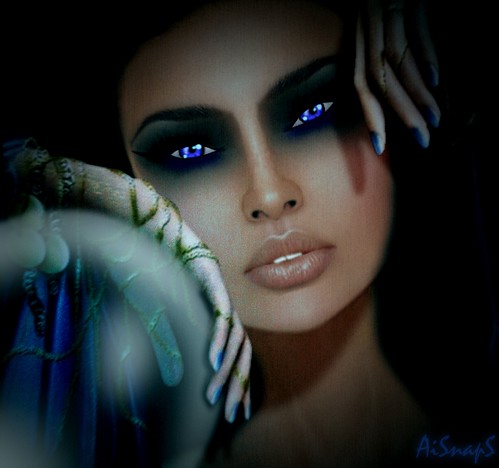
For the ball in her hand at the left bottom I partly used a tutorial from this forum, which I learned already a year ago or something, giggles. Just add a new layer on top of everything, use the ellpise select tool and make a circel, move selection to the right position, in her hand. Get the paint brush, color white on the inside edges and a dot somehwere in the middle. While it is still selected use a strong blur as much as you like and prefer. You can set the opacity less. I have set the layer to uhm I can't remember, perhaps overlay, but you can choose yourself of course.
Meanwhile you can change the eyecolor, make up etc, just by adding an new layer, color on the place where you want to change the color, with the color you like and set the layer on multiply, color dodge, reflect or overlay, whatever looks best.
After this, I flattened, added the option Film - color distortion at zero, in color balance I played a bit with the colors and made it a bit more blue, add vignette.

I always just play around with parts of pictures I found on google, playing around with shadows and colors, but most of my pictures have the same basics, which you can do right now as well.
So, give it a shot!!
Pimp my PIC UP or
SL Picture Pile Ups or
Pile up Only
just go through the pics and if you find one which you like, click with your right mouse on it and you can enlarge it (to the largest res), copy and past it into PDN.
I used this one

get the wand, select the background and delete it.
Most of the time I add a new layer as background and just simply make it black.
Add new layer, line tool and color black, just line around the model to remove sharp corners etc.
Next I googled for some pictures, see what looked nice on this model and found this pic:
 sadly I can't remember where I found it... somewhere on Google, hahaha
Add a new layer and add the right hand (with some sleeve)put it in the right position. Add a new layer and add the left hand and put it in the right position.

!Make sure the hands are cut perfectly, maybe enlarge it a bit if it's necessary, but make sure it won't look pixelated. You can now merge layer down so the 2 layers with the hands are now one.!
If you duplicate the hand layer, get the wand and select the transparancy in the bottom 'handlayer' ctrl-I and paint the hands black, so you have the normal colored hands on top and the black underneath. now you can move the black hands layer cause they are the hand shadows, in the position you like. Make sure that in a later stage where you add other shadows, the will go in the same direction. Set gaussian blur at something between 2 and 6, layer properties - reflect.
If you'd like to know how exactly I did the shadows, just look at my other tutorial: painting a hand (link will be posted as soon as possible).
so, now you have the layers:
black background
basic model
black lines around the model to make it sharp
hands shadows
hands
Now we add a layer on top of the hands and paint black around the face, more around the forehead than around the shoulders. Gaussian blur as much as you like I did that around 60 or 65.
To add shadow under the chin you create a new layer on top of the basic layer, make the shape of the shadow with the line tool and color it black, gaussian blur between 2 and 5. Layer property - reflect
For the ball in her hand at the left bottom I partly used a tutorial from this forum, which I learned already a year ago or something, giggles. Just add a new layer on top of everything, use the ellpise select tool and make a circel, move selection to the right position, in her hand. Get the paint brush, color white on the inside edges and a dot somehwere in the middle. While it is still selected use a strong blur as much as you like and prefer. You can set the opacity less. I have set the layer to uhm I can't remember, perhaps overlay, but you can choose yourself of course.
Meanwhile you can change the eyecolor, make up etc, just by adding an new layer, color on the place where you want to change the color, with the color you like and set the layer on multiply, color dodge, reflect or overlay, whatever looks best.
After this, I flattened, added the option Film - color distortion at zero, in color balance I played a bit with the colors and made it a bit more blue, add vignette.

I always just play around with parts of pictures I found on google, playing around with shadows and colors, but most of my pictures have the same basics, which you can do right now as well.
So, give it a shot!!


